3 ways to create an adventure route for your GPS
Whether you're planning a hike, a trail run, a bikepacking trip or a road trip, preparing your route thoroughly before you leave has many advantages. Loaded into your GPS, the itinerary can be used to follow your route turn by turn or just as a reference whenever you're lost.
Here are 3 ways to create an itinerary and download it for your GPS device.
Google My Maps
Google My Maps is an application from Google designed to create custom maps which can be downloaded as KML or KMZ files. Creating an itinerary there is quick and simple:
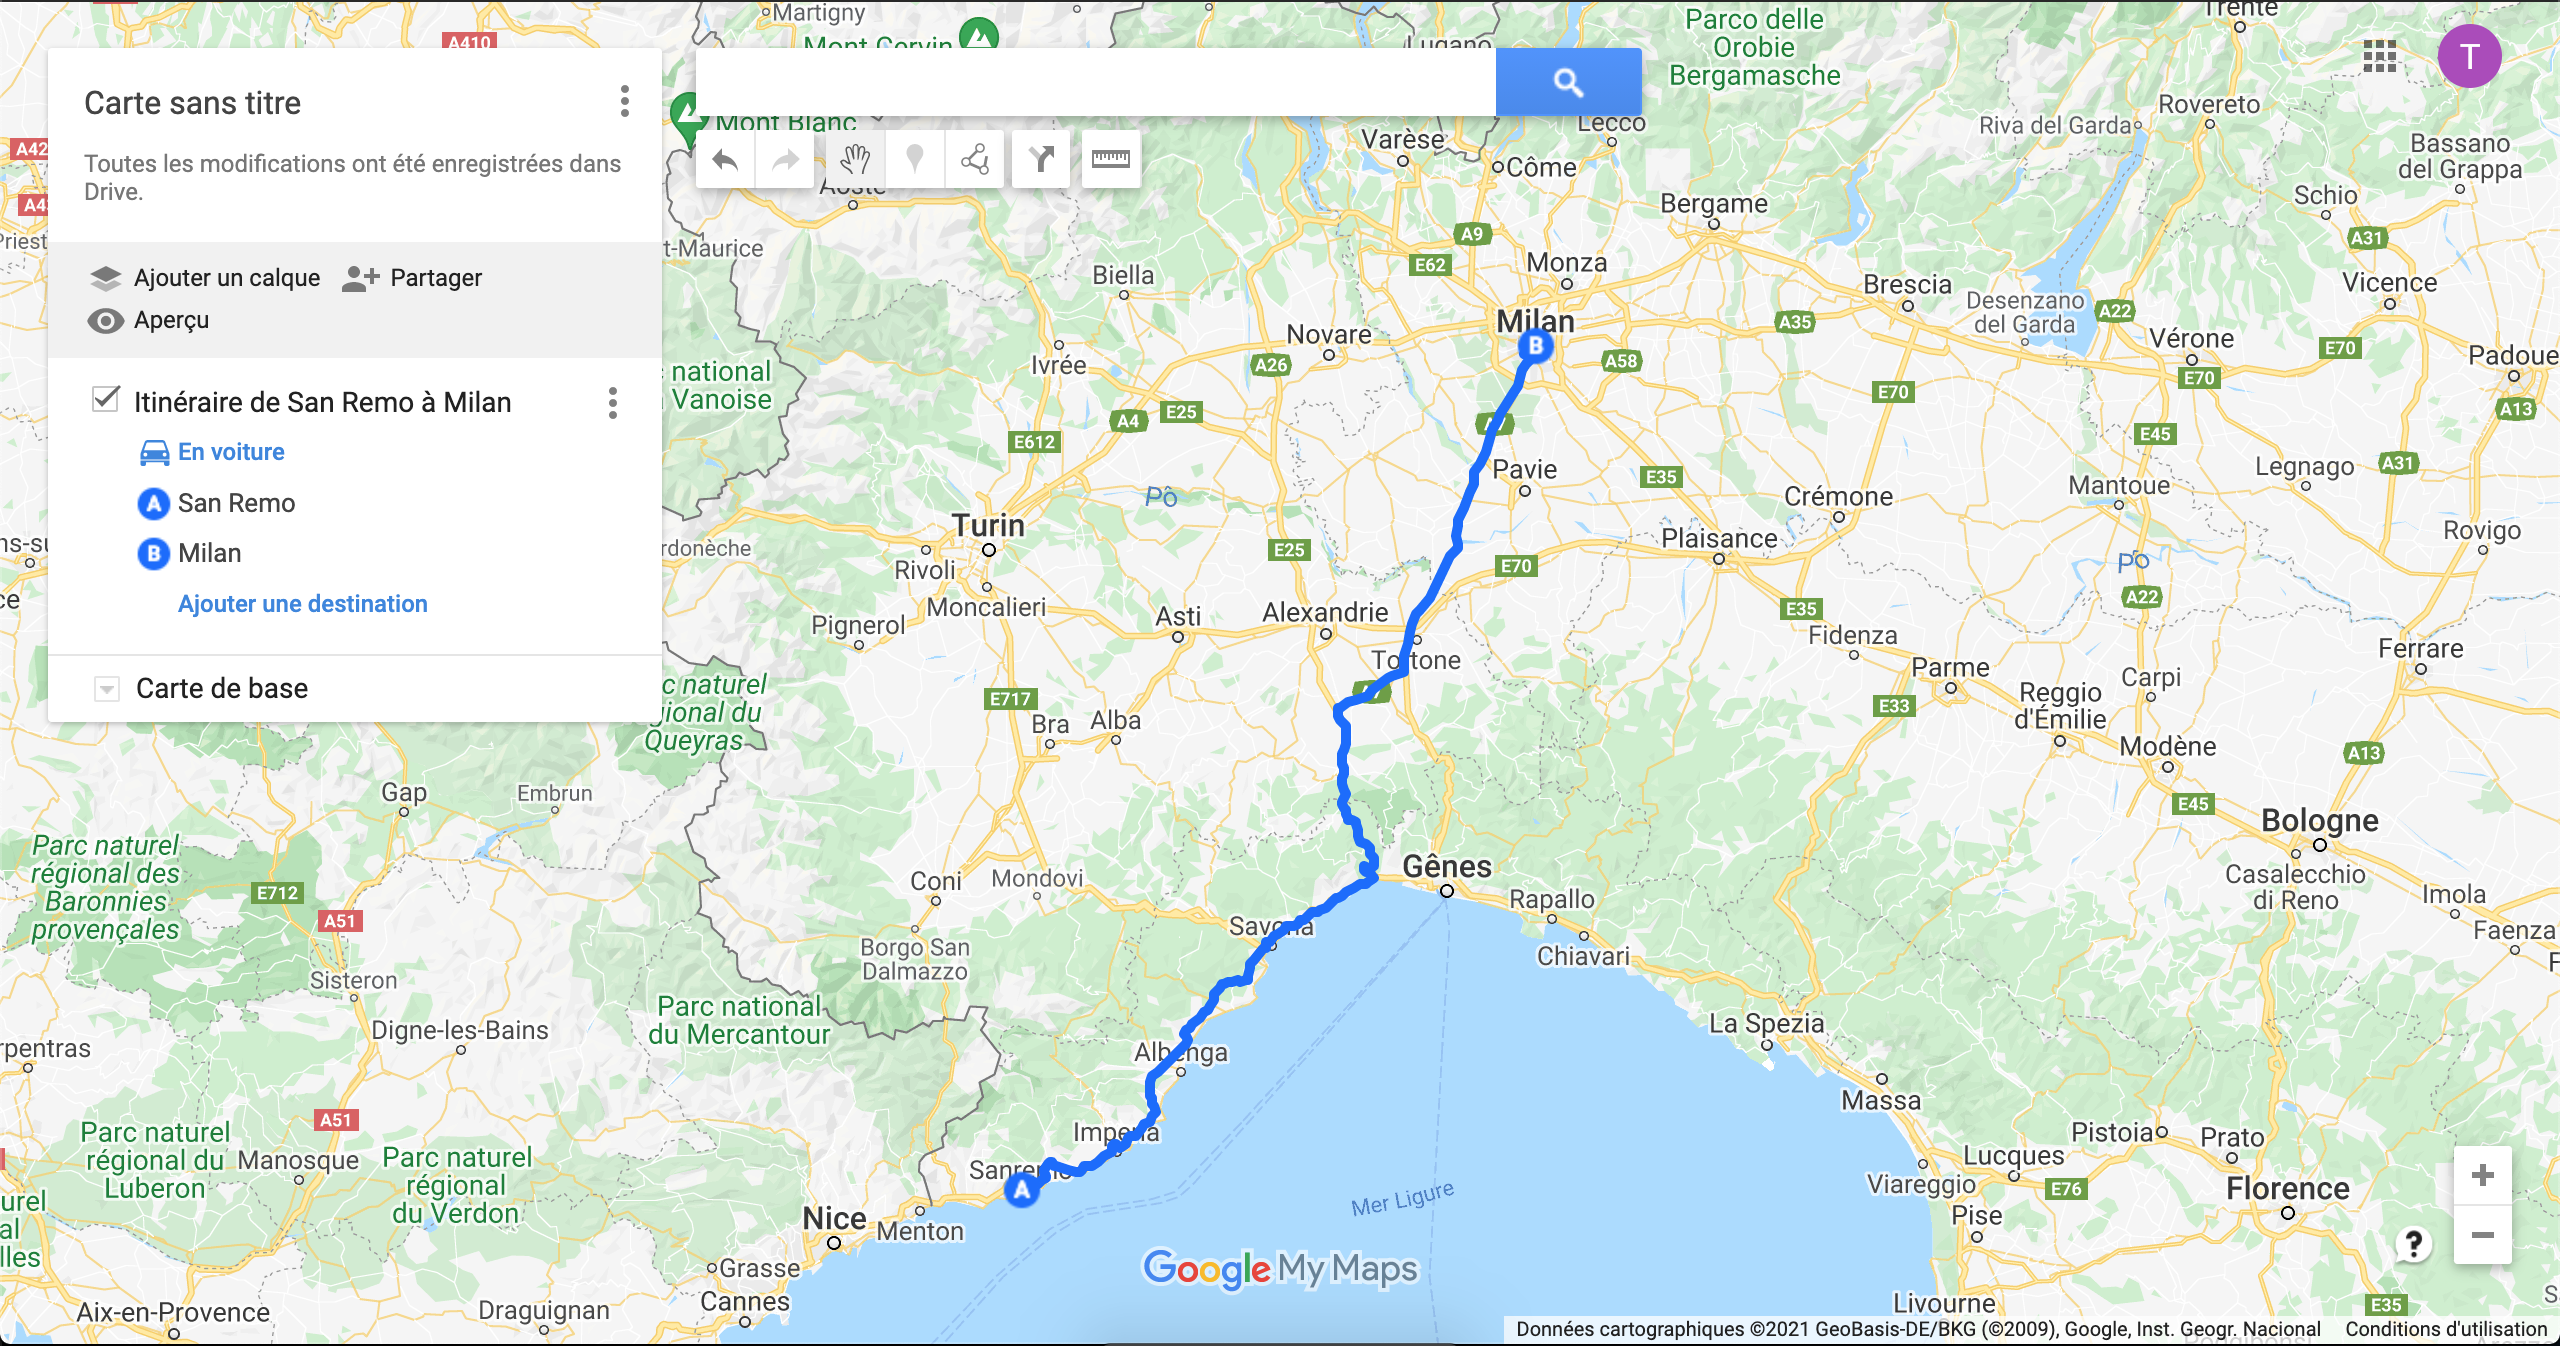
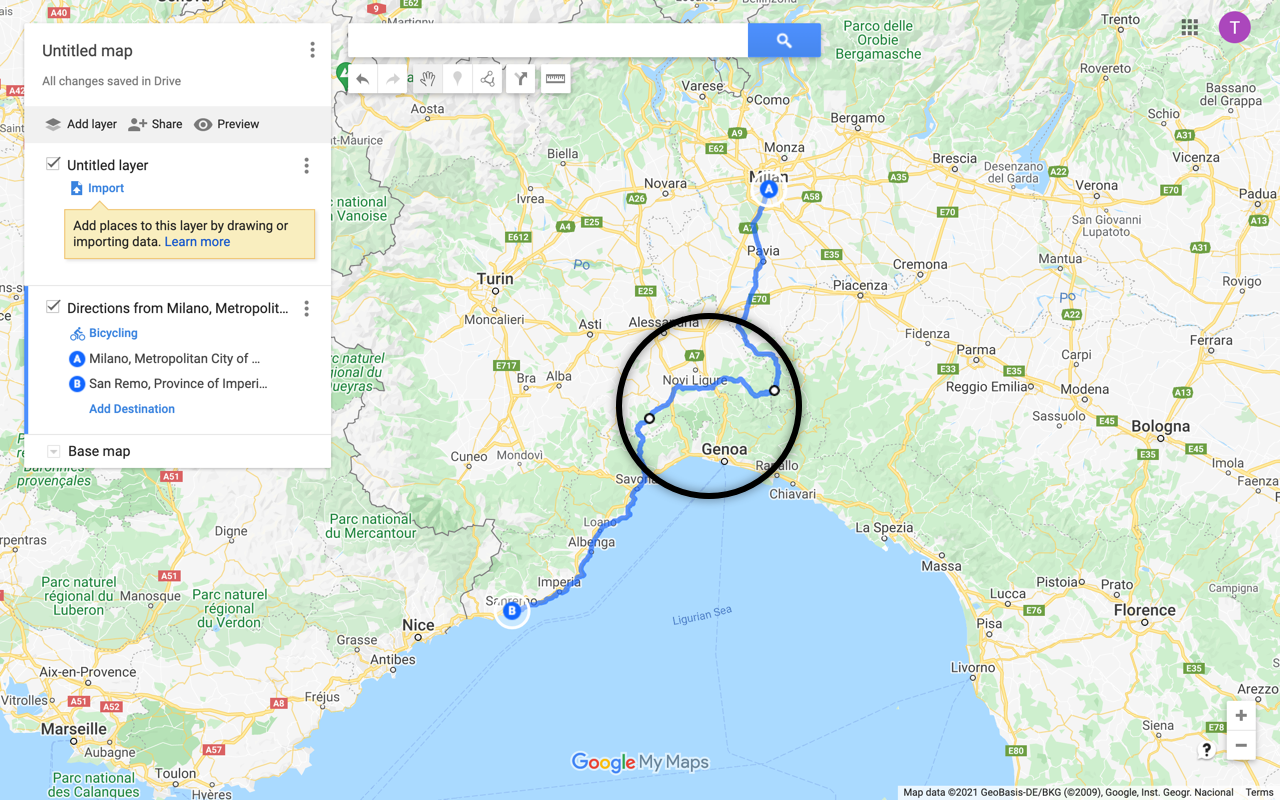
1) You start by clicking on the Add a route button located under the search field to start creating a route.
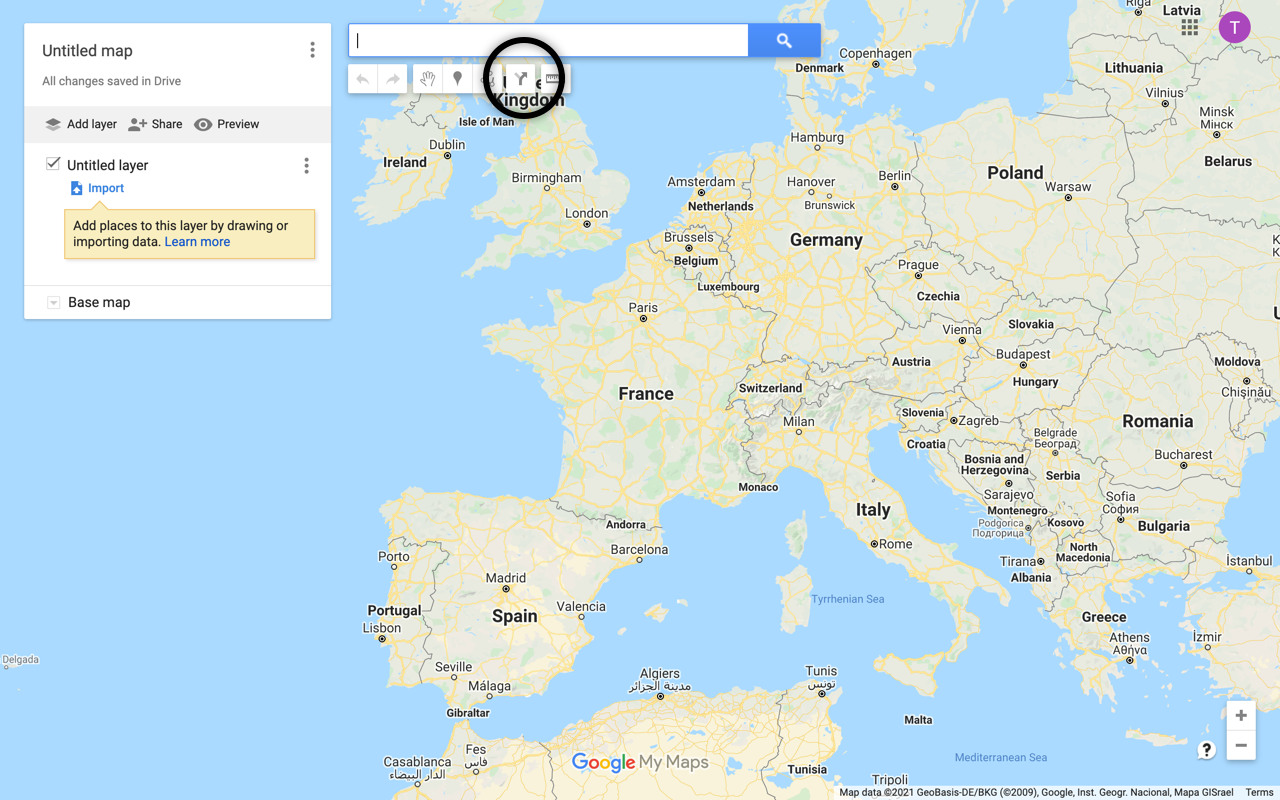
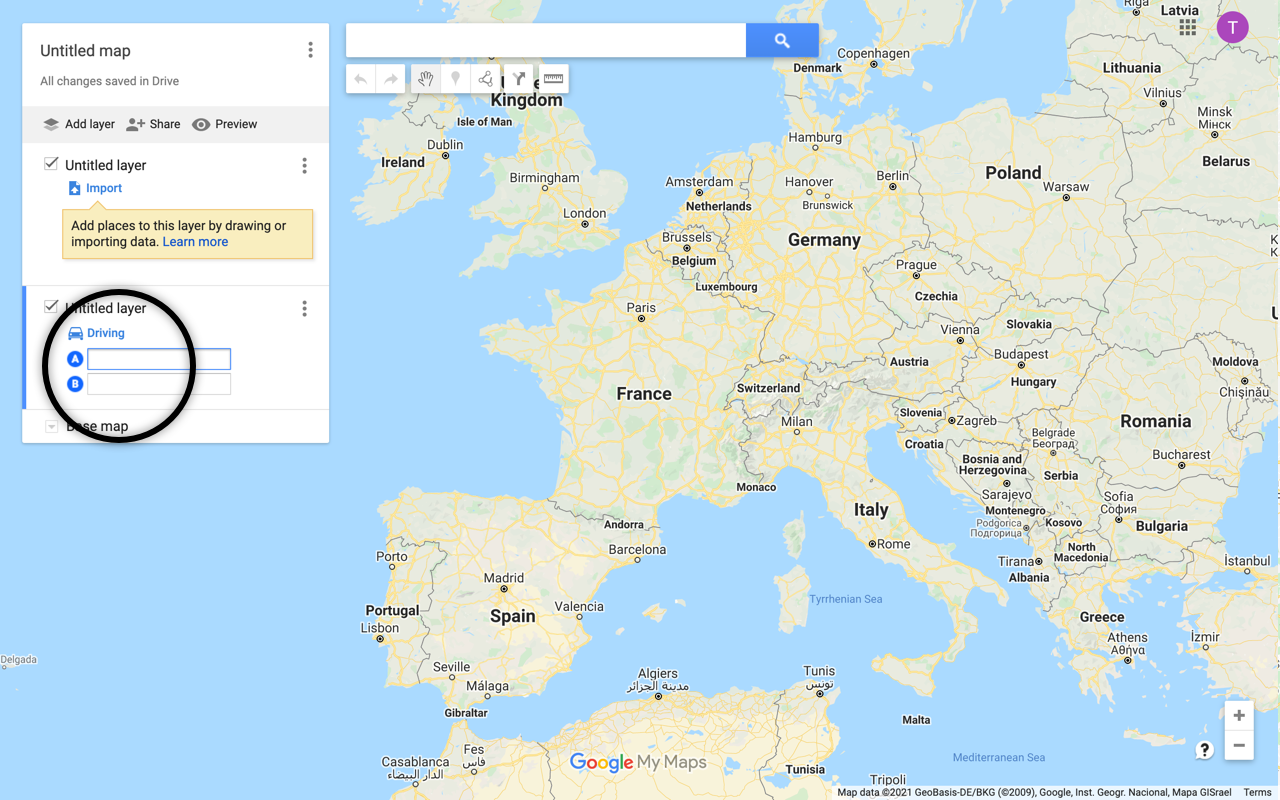
2) A layer appears in the left hand side column where you fill in your departure point (A) and your arrival point or stopover (B).
3) The route now appears on the map. By clicking on "Driving", you can change the mode of transportation to "Bicycling" or "Walking" instead. The application then updates the itinerary to adapt it to the chosen mode, avoiding highways and favoring bicycle or pedestrian paths.
4) You add as many steps as necessary by clicking on "Add Destination" and if necessary we reorder them by dragging and dropping the steps in the order we want.
5) To take certain roads, avoid others or cross certain villages, you can modify the route by hand by hovering over it to make a black dot appear which you can drag until the route takes the desired route. You repeat this as many times as necessary.
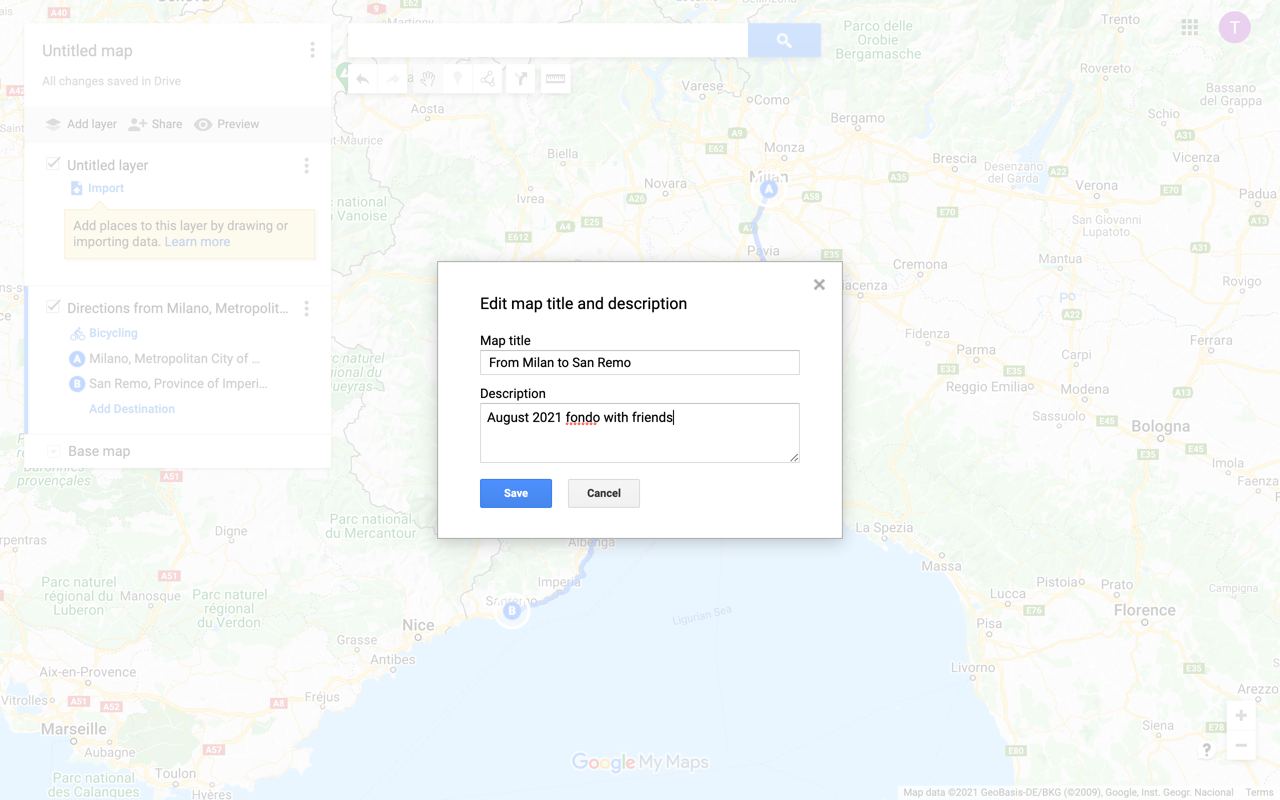
6) Once our route is finished, we give a name to our map by clicking on "Untitled map".
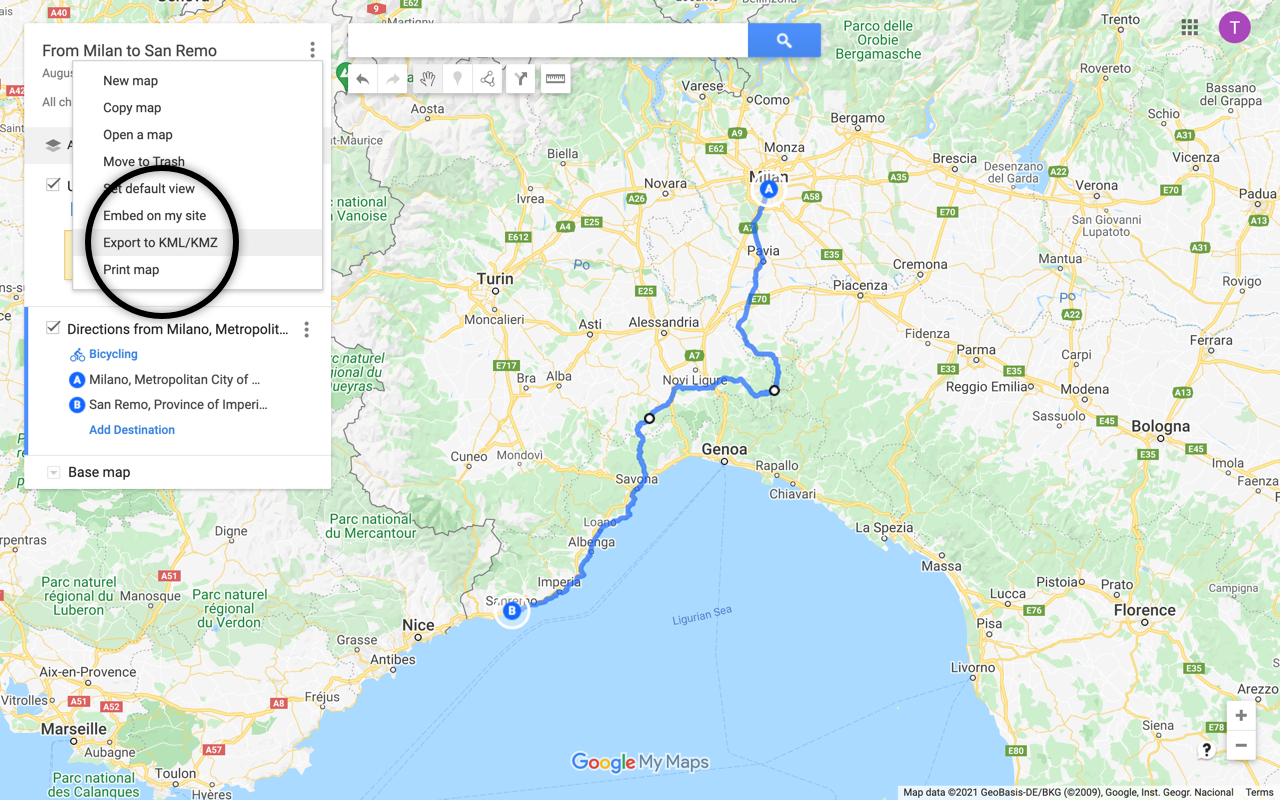
7) It can then be exported in KML or KMZ format.
Komoot
Komoot is a route planning and routing application for outdoor activities. It allows you to create a itinerary adapted to your chosen mode of travel (road bike, gravel bike, mountain bike, running...).
1) From the route planner, you start by choosing your activity (hiking, biking, mountain biking, road cycling, running...) and the desired intensity according to your physical condition (from untrained for the most gentle to pro for the most intense).
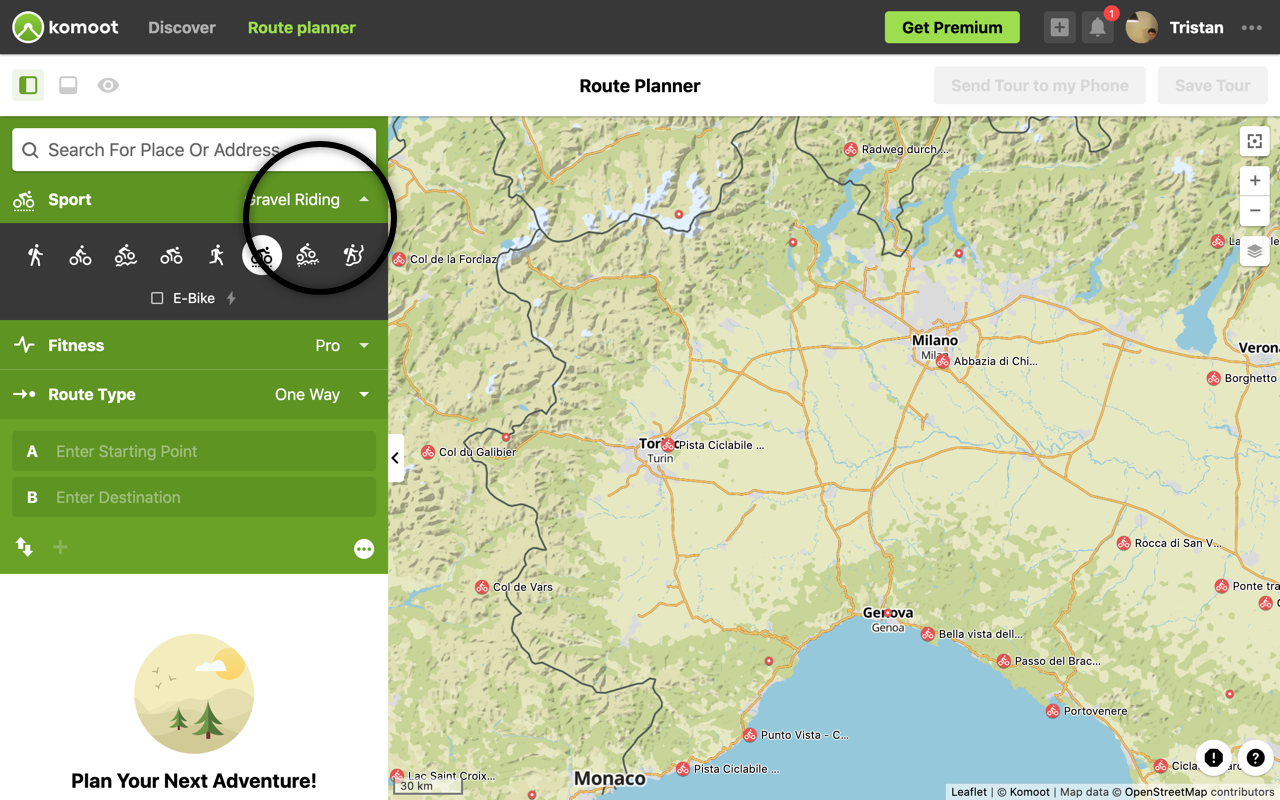
2) You can enter a starting point and an ending point by clicking on the map or by searching for them with the search form located at the top left of the application.
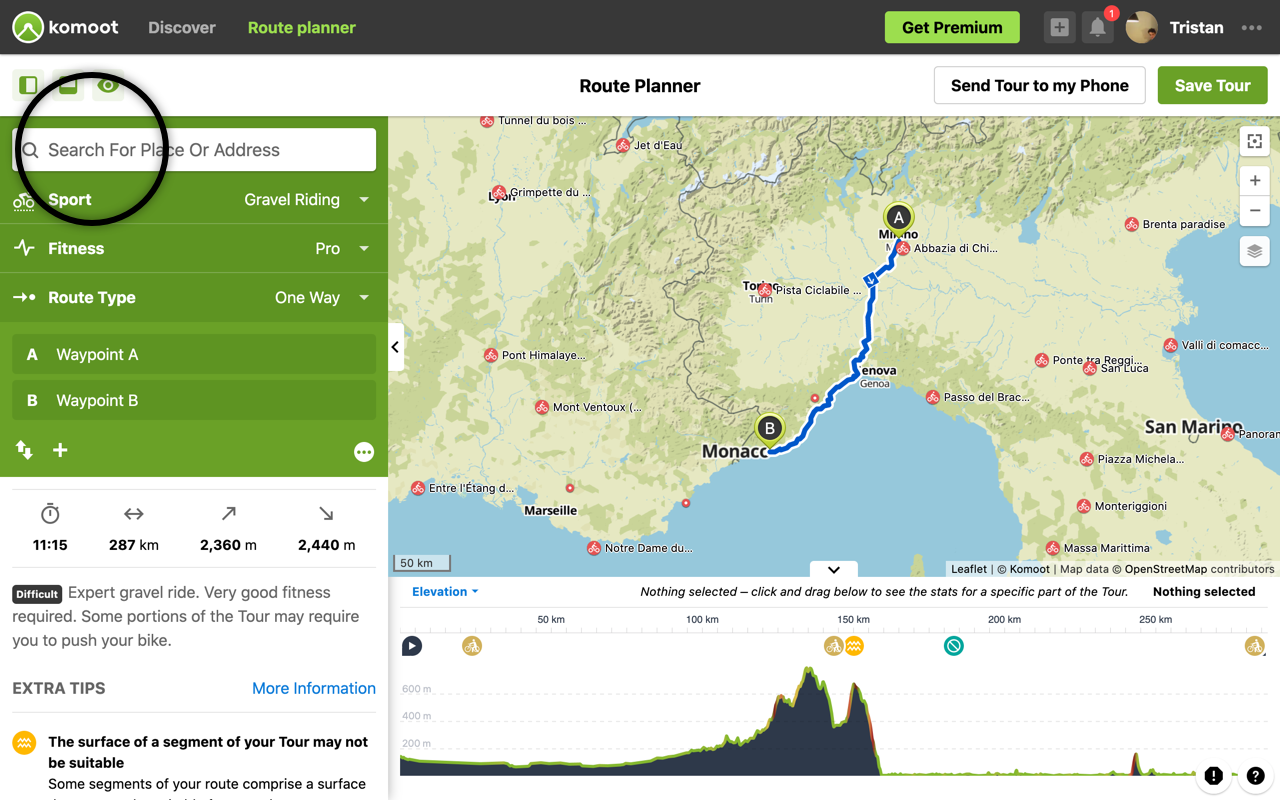
3) As with Google My Maps, you can add waypoints by clicking on the + symbol located under the waypoints A and B on the left side of the application or hovering over the route to have the blue handles appear.
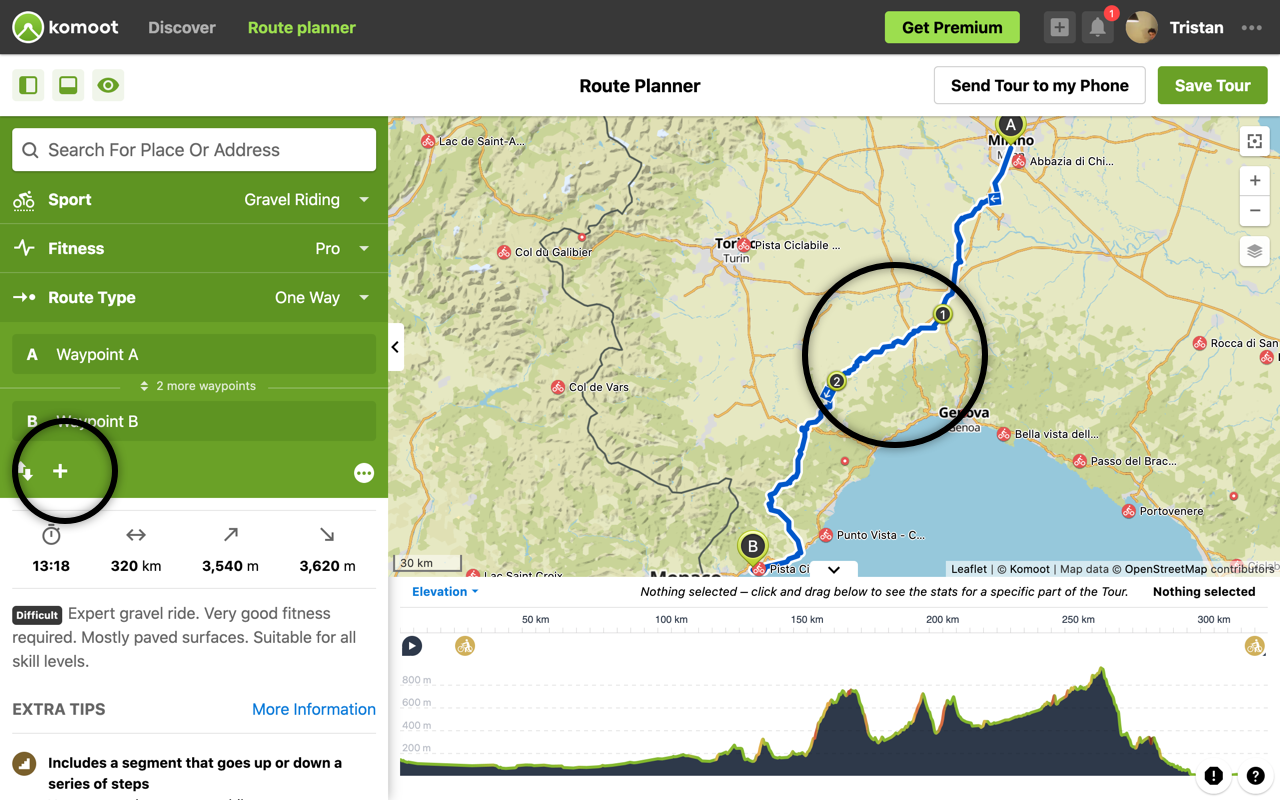
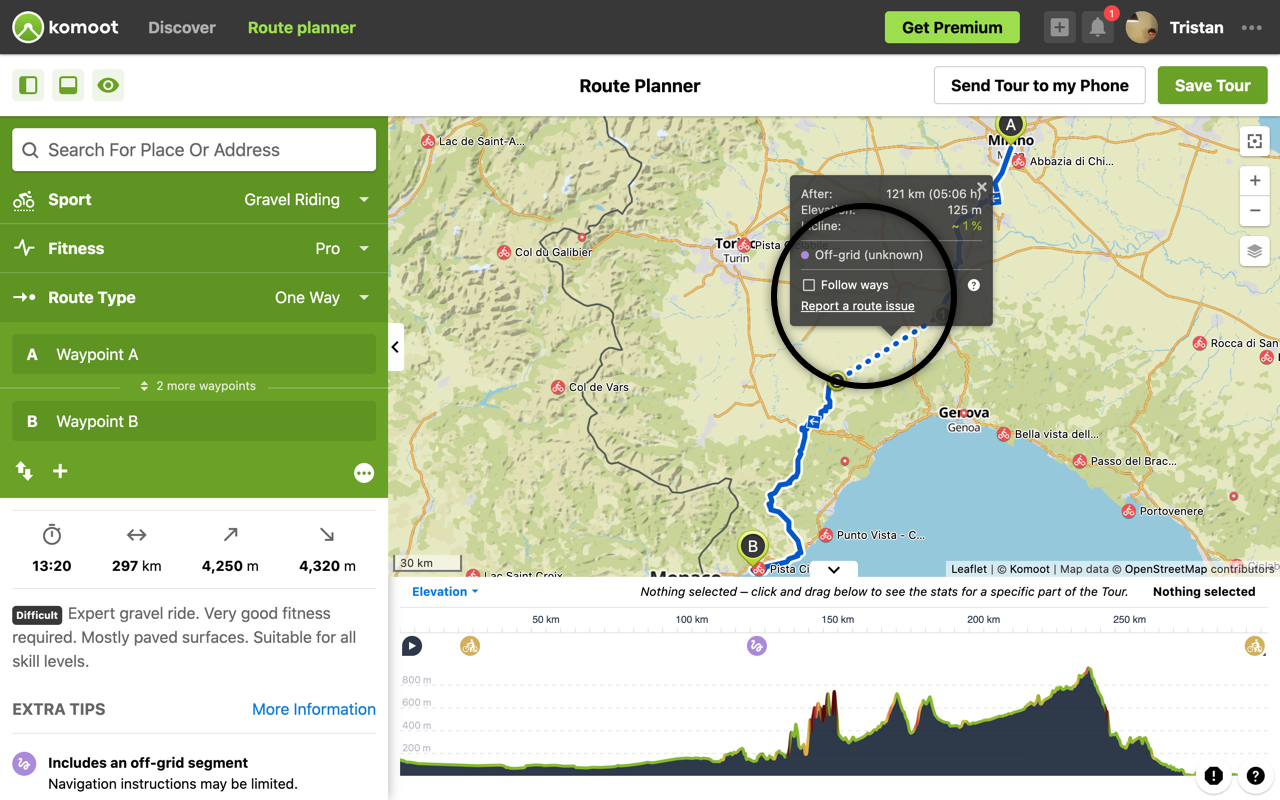
4) In the case of a route or an off-road segment, simply click on the segment in question to uncheck "Follow ways".
5) Once the itinerary is finished, you click on "Save Tour" and then "Export to GPS device" to download the file in GPS format.
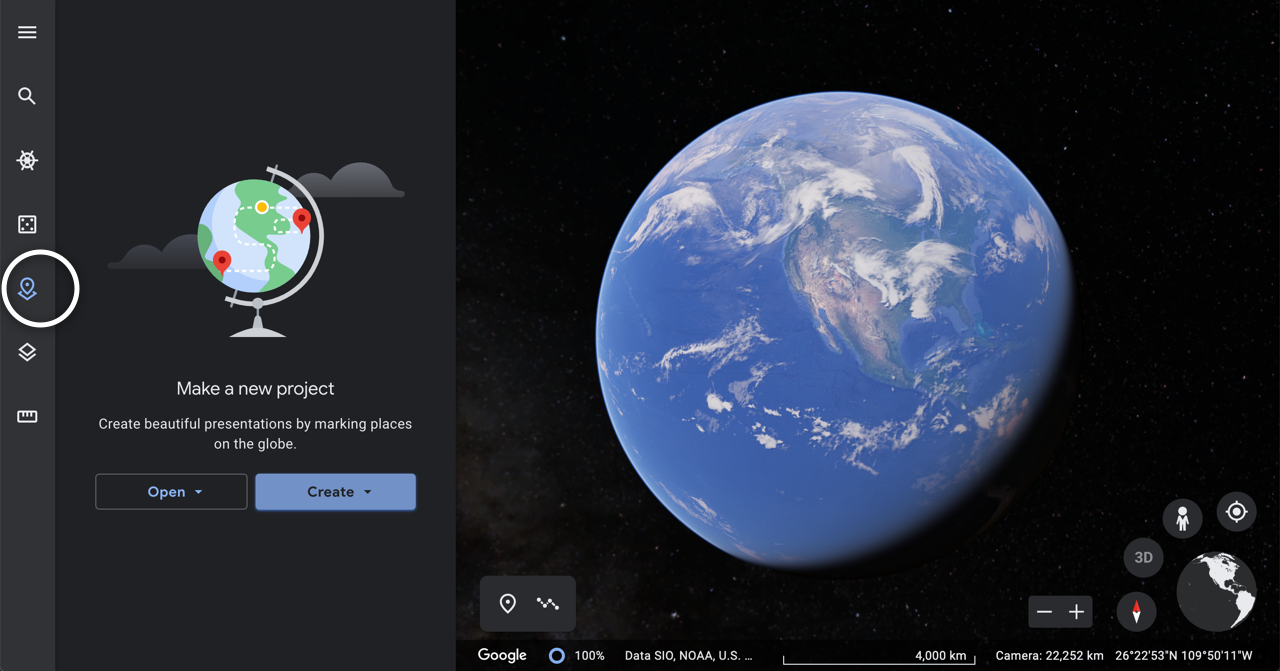
Google Earth
Google Earth is only suitable for route planning where there are no known roads. Whether you are planning a ski tour in the Massif des Ecrins, a trek in the Mongolian hinterland or a desert crossing by 4x4 through the dunes, it is a good tool to draw your route.
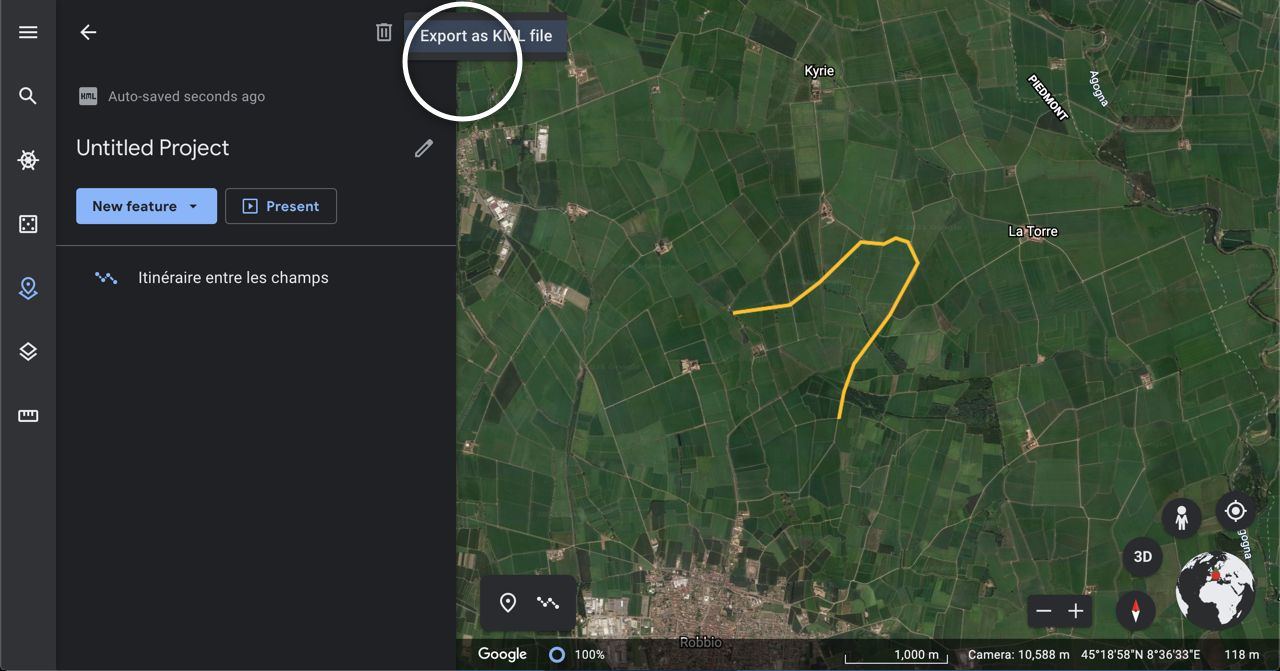
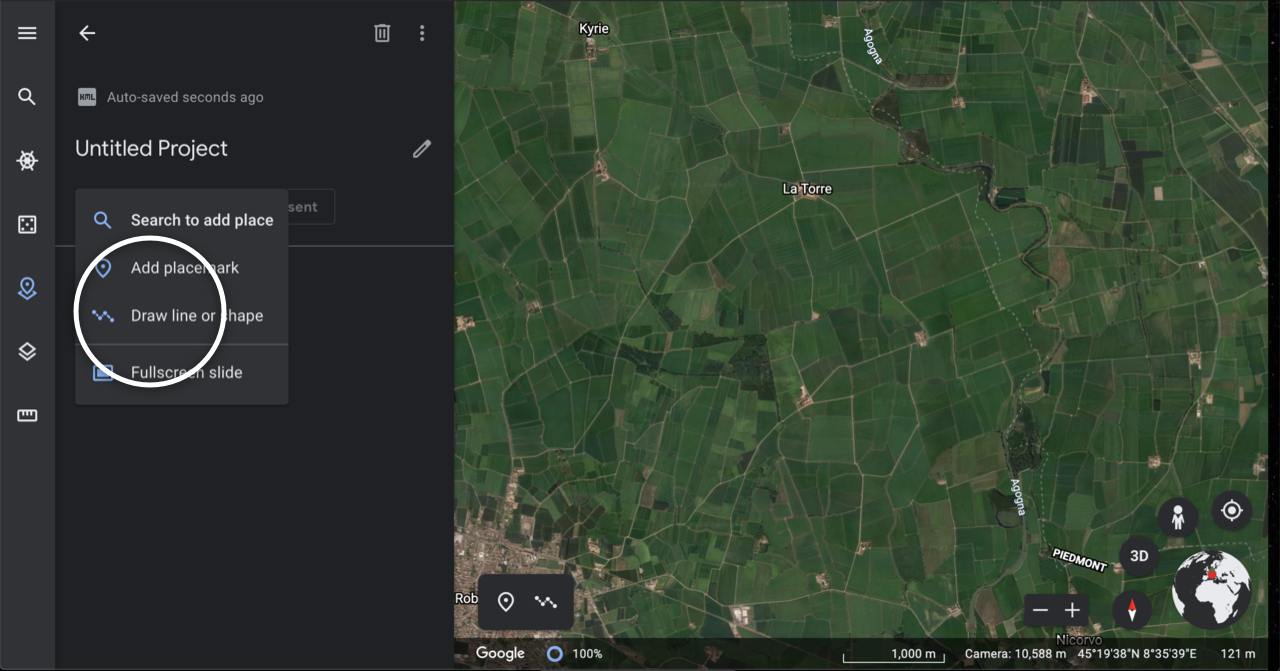
1) We start by creating a new project by clicking on the "Projects" button on the left of the application and clicking on "Create" then "Create KML file".
2) From the project we click on "Draw line or shape" to start drawing our trace.
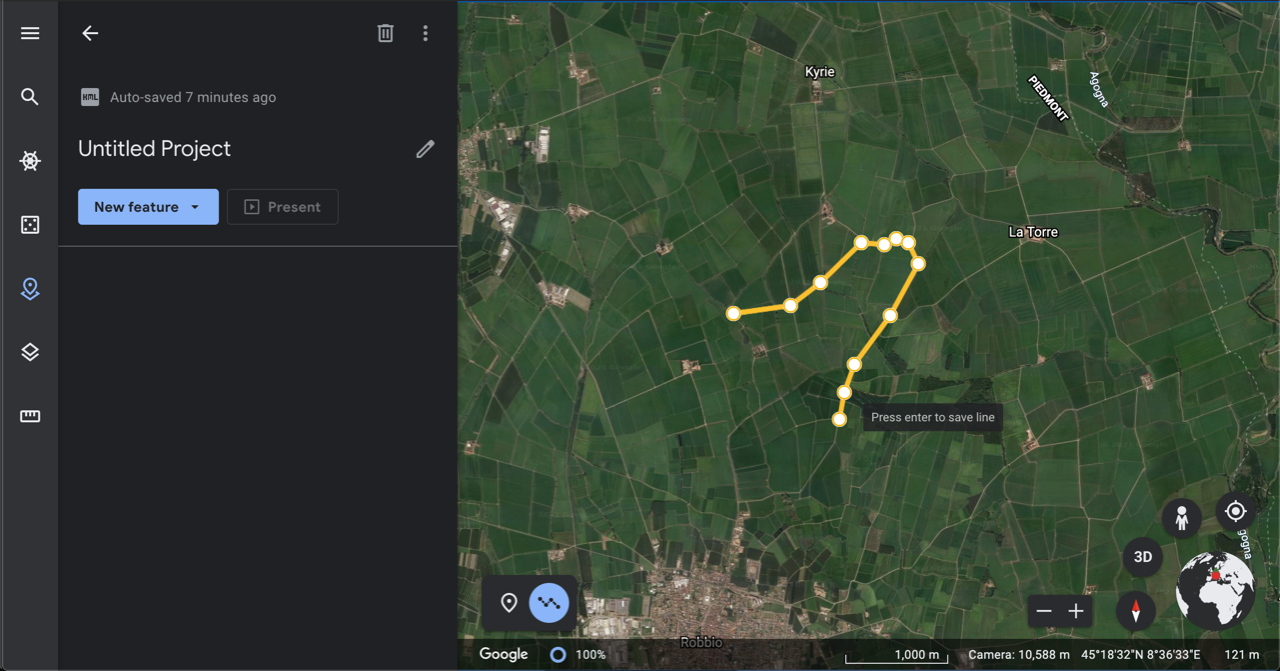
3) Point by point, you draw the trace and then press the enter key to save it.
4) Once finished, we download the route file by clicking on the "More Actions" icon at the top of the application and then "Export as KML file".